Step-by-Step Guide for Setting up a Printer via Print Server on Ubuntu:
1. Open Printer Settings:
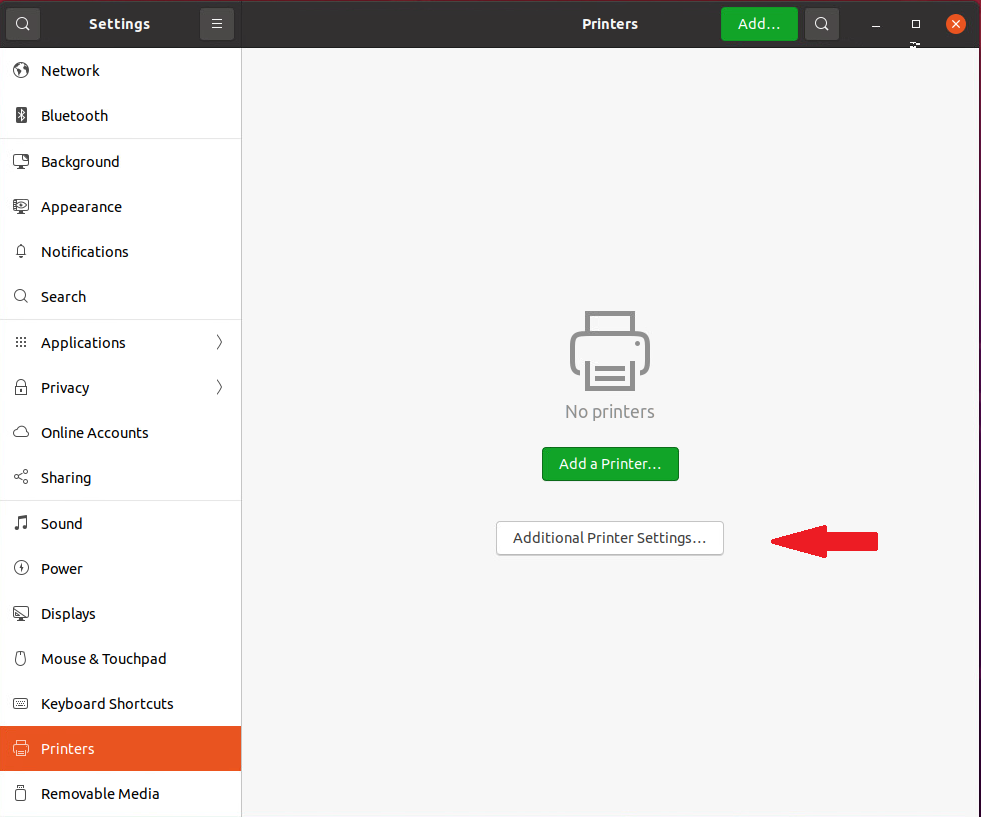
As seen in the image, open the “Settings” menu on your Ubuntu desktop, and then navigate to “Printers” on the left-hand side.
2. Access Additional Printer Settings:
Click on “Additional Printer Settings…” . This will open a new window where you can configure printer connections.
3. Add a New Printer:
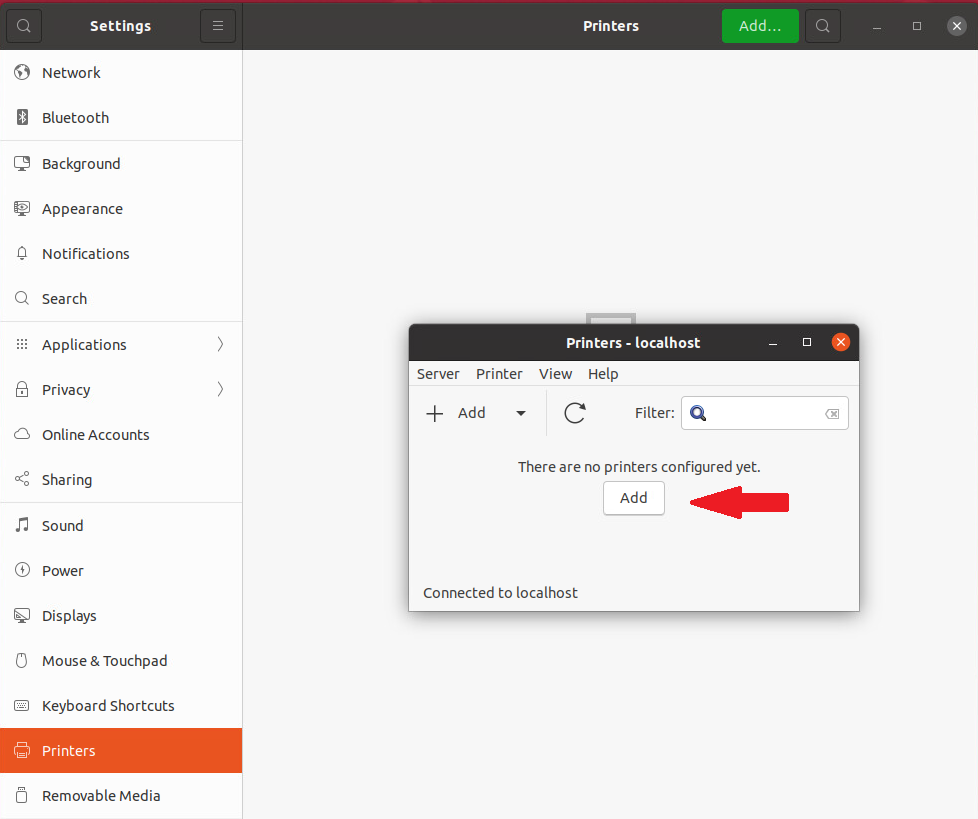
In the second image, click on the “Add” button. This will start the process of adding a new printer.
4. Enter the Device URI:
As shown in the image, in the “Enter device URI” field, you need to enter: ipp://132.68.32.89:631/printers/name of printer from this list.
press “Forward”
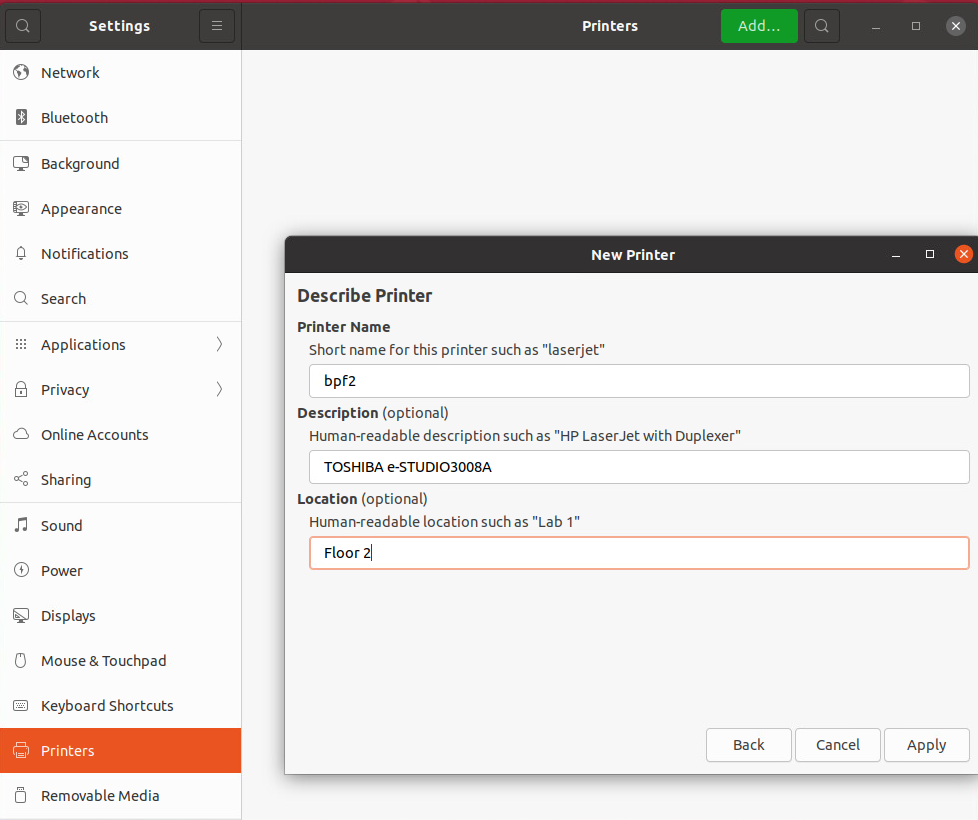
5. In the “Short name” field, enter the printer name and click Apply.


